The SEL WORKBOOK CREATOR
There is nothing quite like our SEL (Social and Emotional Learning) Workbook Creator. After years of creating individual worksheets for people addressing mental health issues, we decided to create a that therapists and counselors can create an entire workbook for their clients. . . . in 30 minutes or less! You can also use the Workbook Creator to “write” a “generic book” for your practice, school, or agency.
Write a workbook for a single client, based on their Problem Checklist or write a workbook for your entire practice, school, or agency.
How It Works
Creating a Workbook For a Single Client
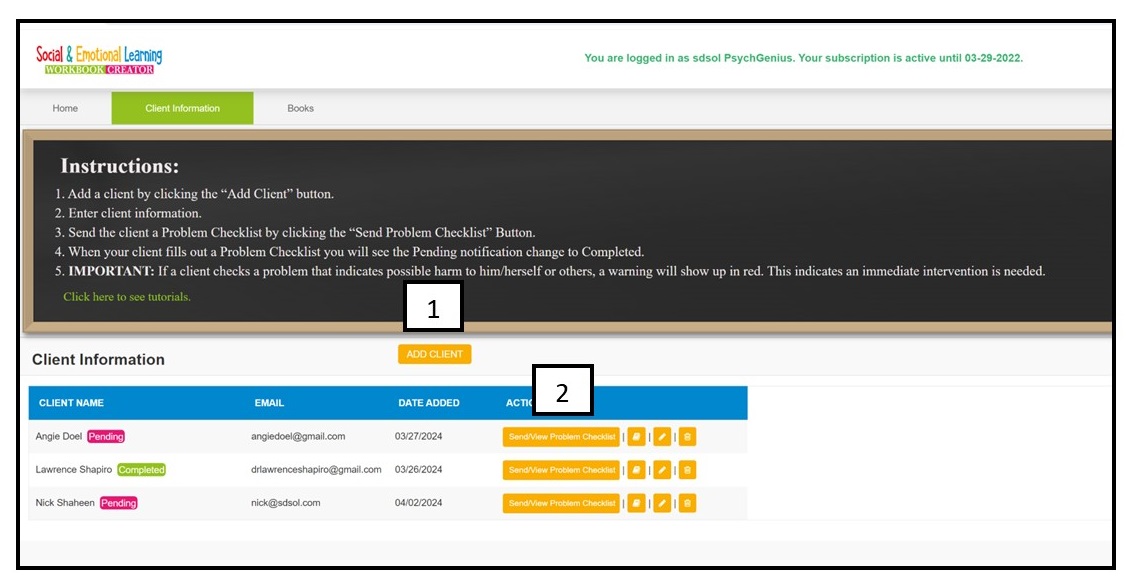
1. Click “Add Client” and fill out the basic information.
2. Click “Send View/Problem Checklist.”
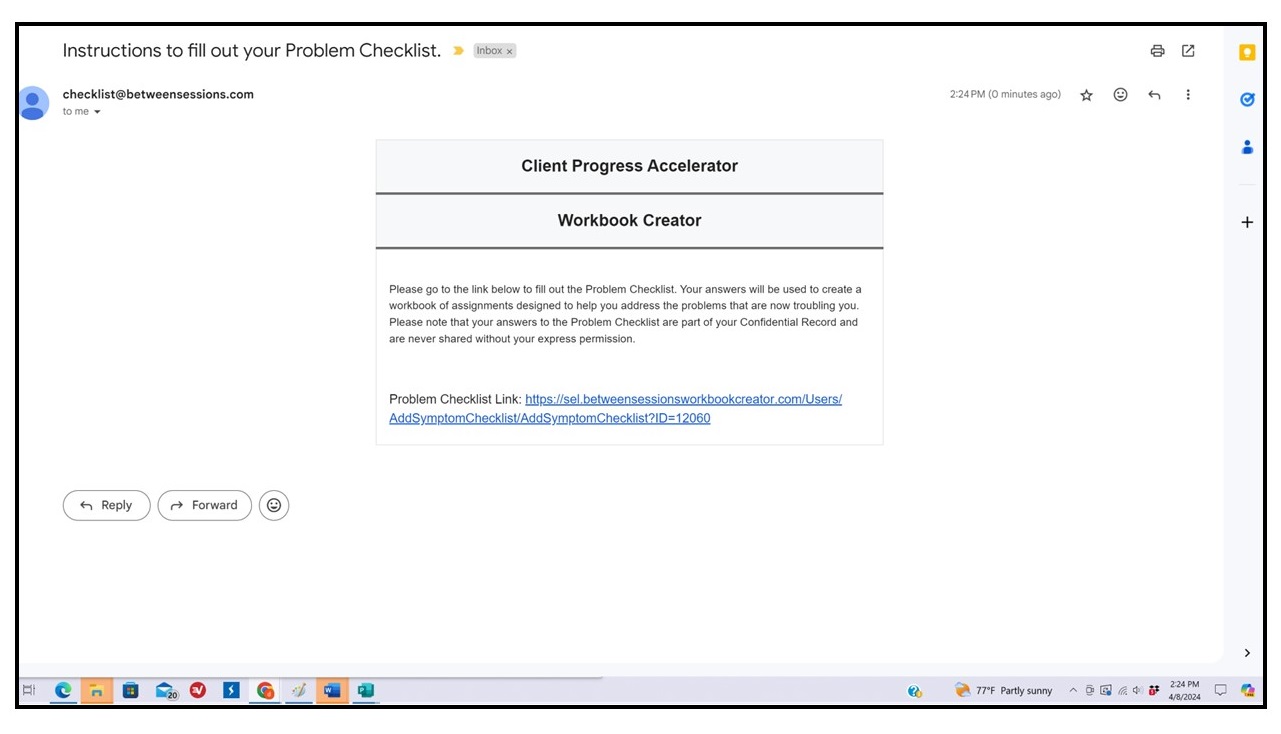
3. Then send the Problem checklist to your client. They will get an email to fill out a Problem Checklist which will tell the software what kind of worksheets to select for the Workbook.
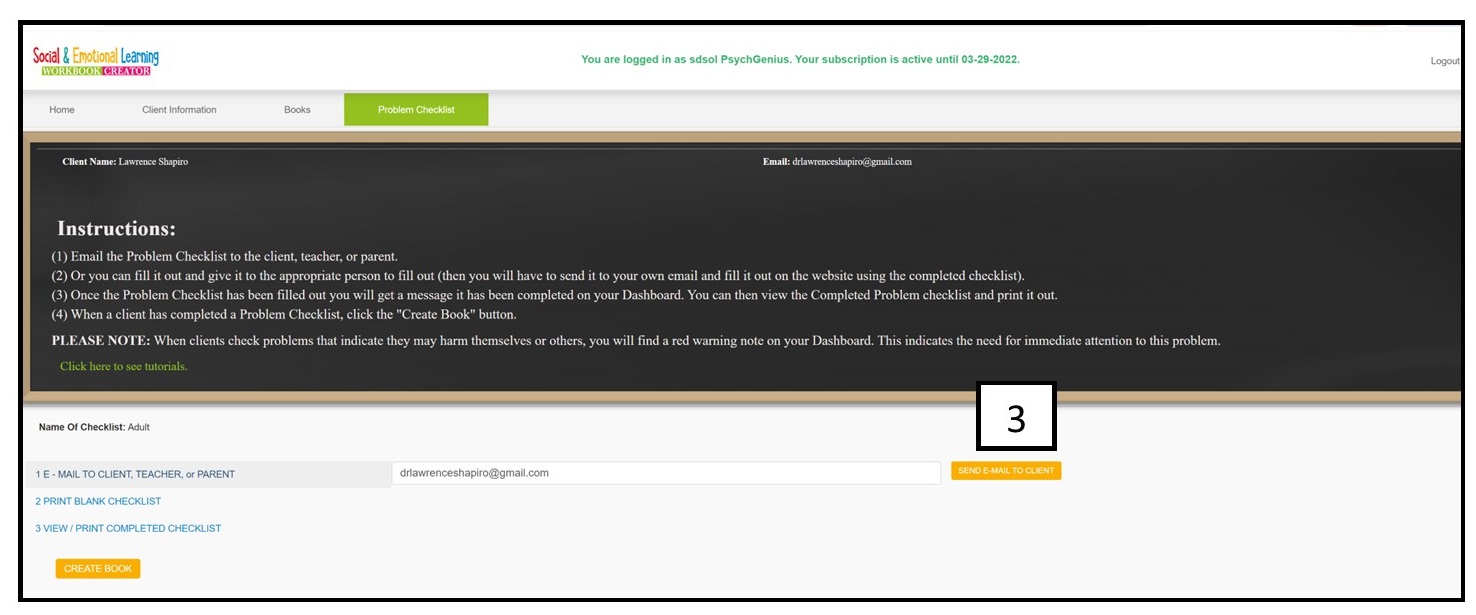
4. Your client will get an email from “Checklist@BetweenSessions.com.”
5. When they click the link, it will open the Problem Checklist. Your clients should read through the checklist, checking the problems they are experiencing and rating their severity. They then click “Send” and the completed Problem Checklist will be visible to you.
6. The Problem Checklist will connect to our Library and our algorithm will select the appropriate worksheets to address each client’s problems.
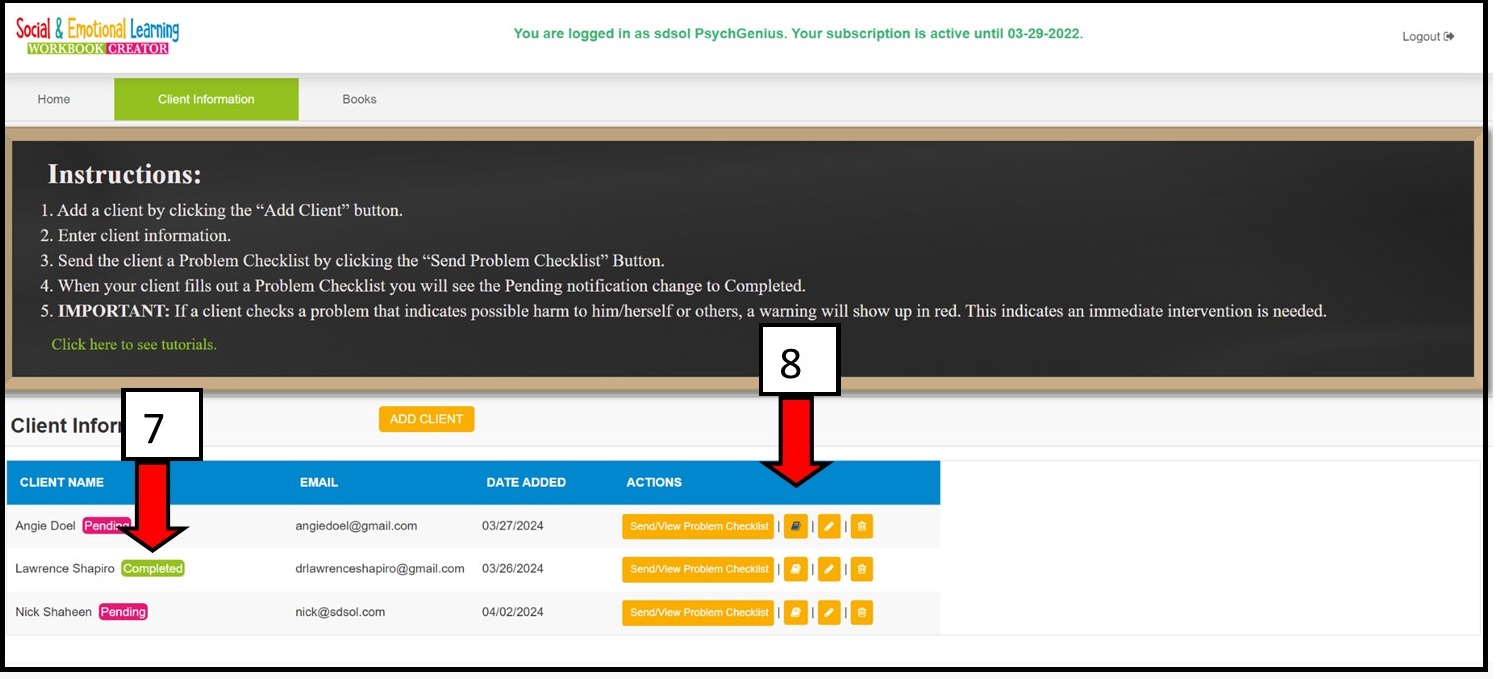
7. When your client has filled in the Problem Checklist, you’ll see the Pink Pending Button change to a Green Completed Button.
8. Go to your client screen and click “Create Book.”
9. You’ll begin creating your book by reviewing the worksheets that the software selected for your book, based on a completed Problem Checklist. Read the description and objective and view the PDF.
10. If you want to include a worksheet, put a checkmark in the box. Scroll down and add as many worksheet as you like.
11. Click the yello button to add worksheets to your book.
12. The total number of pages in the workbook will show up and change as you add worksheets. Note: We reccommend keeping the workbook at less than 80 pages. You don’t want to overwhelm your clients with assignments.

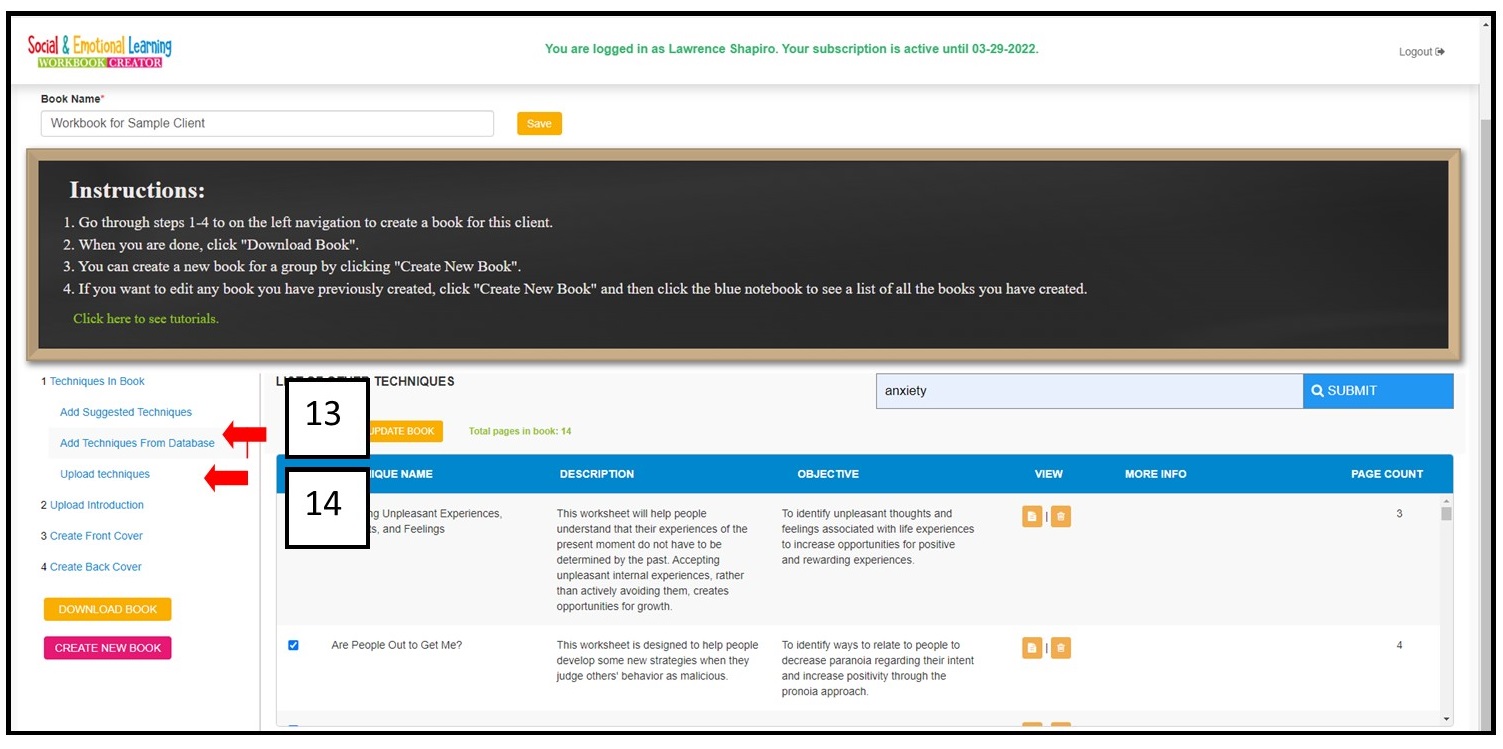
13. You can add more tools from our database by just putting in a keyword. Add the ones you like to the book with a checkmark and make sure you “Update Book.” Check to see if the page count was updated.
14. You can also upload tools to the database.
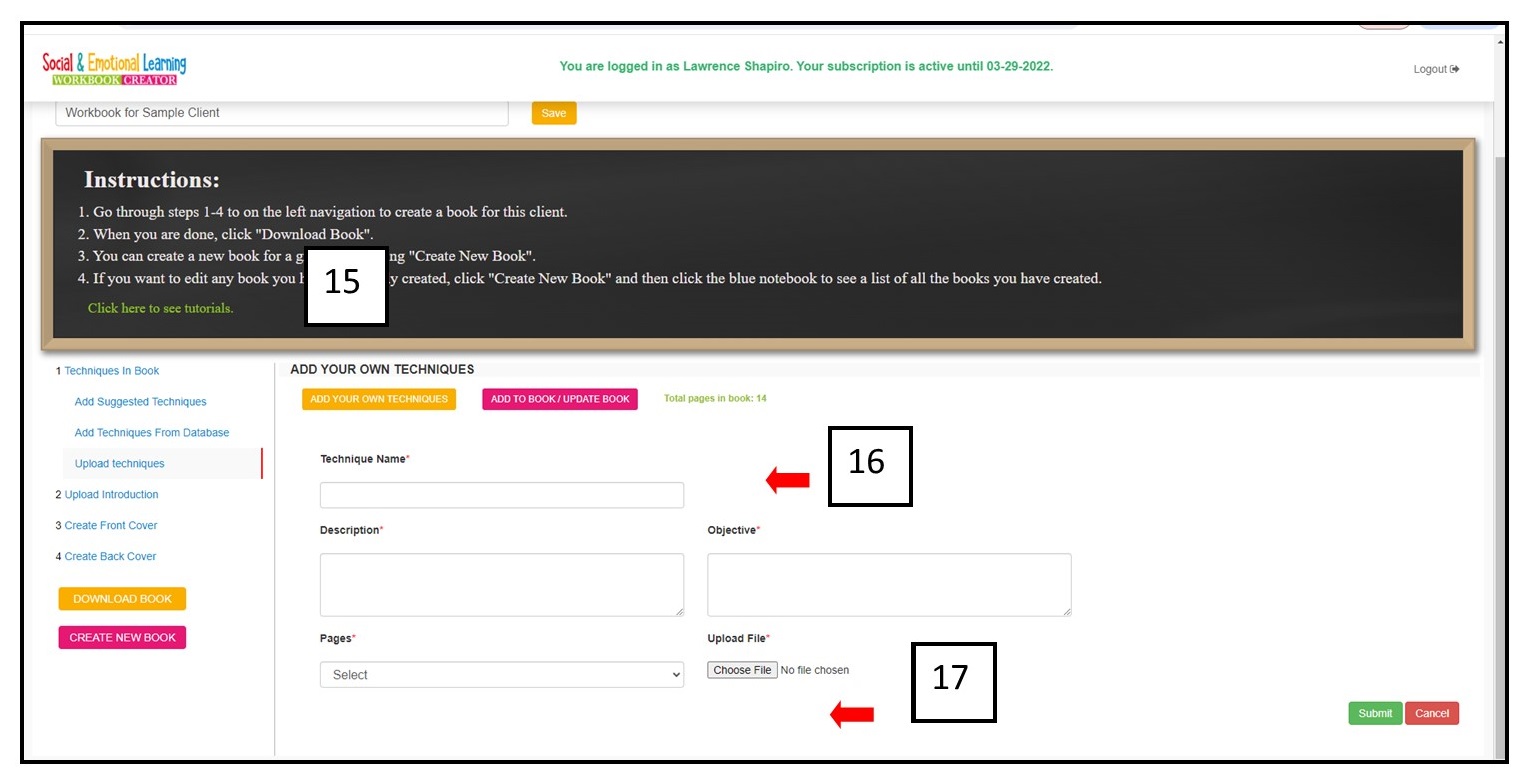
15. Click the link on the left and then (16) add the name of the worksheets, a description, and an objective.
17. Upload the worksheet and then click the box by the worksheet you just uploaded and click ‘Add to Book.”
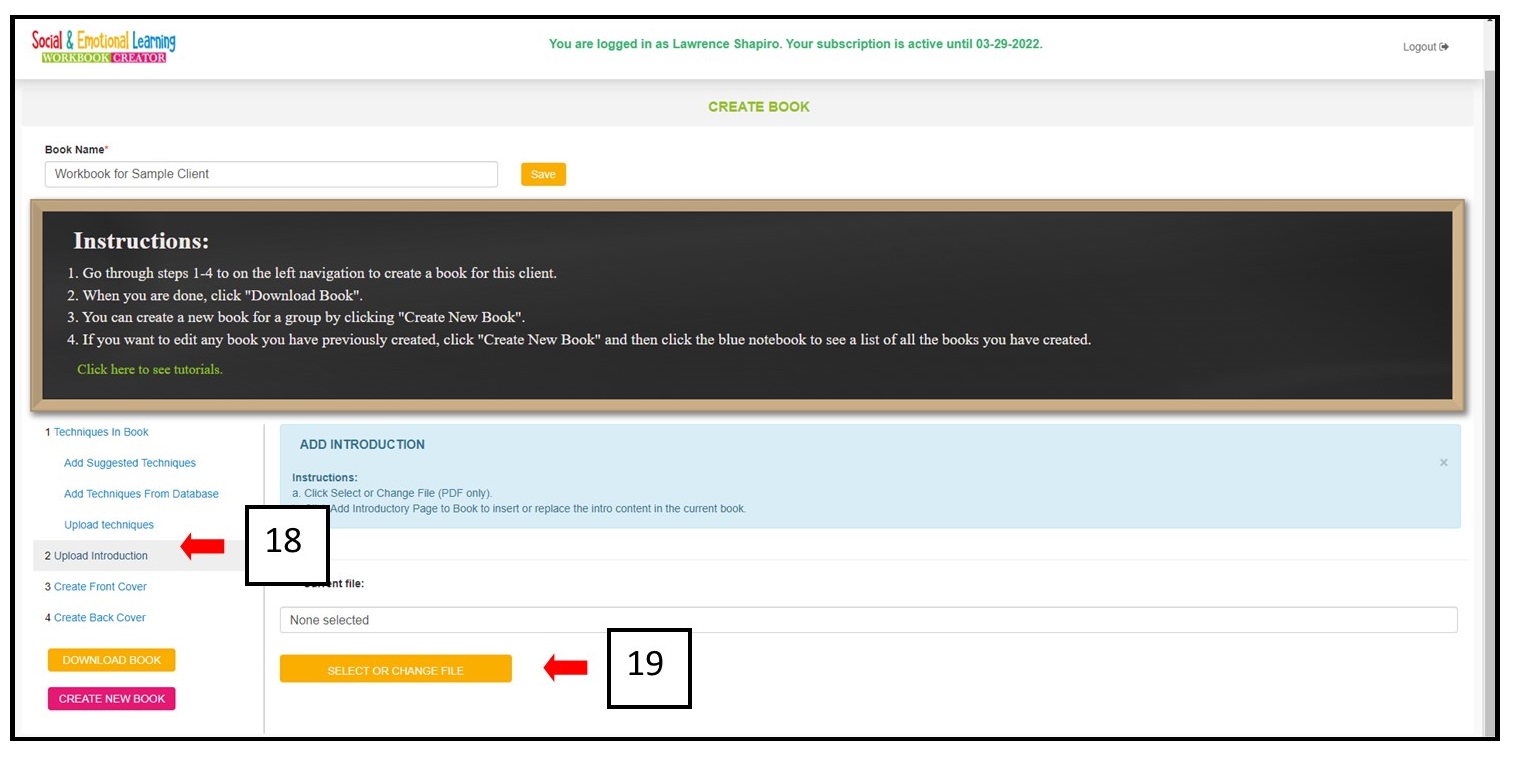
18. When you are done adding worksheets, it’s time to finish the book by adding an Introduction and a Cover. Click to add an Introduction to your workbook. Please note that this MUST be in PDF Form. We recommend that you write your own personalized introduction.
19. Click to Upload the Introduction and add it to your workbook.
23. It’s easy to add a cover from one of our templates and you can also upload your own cover (in a jpg format). Either way, you will be able to customize the cover with our editor once you open it.
21 Just click on the cover you like to open the Cover Editor.
22. Or upload an image of your own, which will be added to your Cover Library.
.
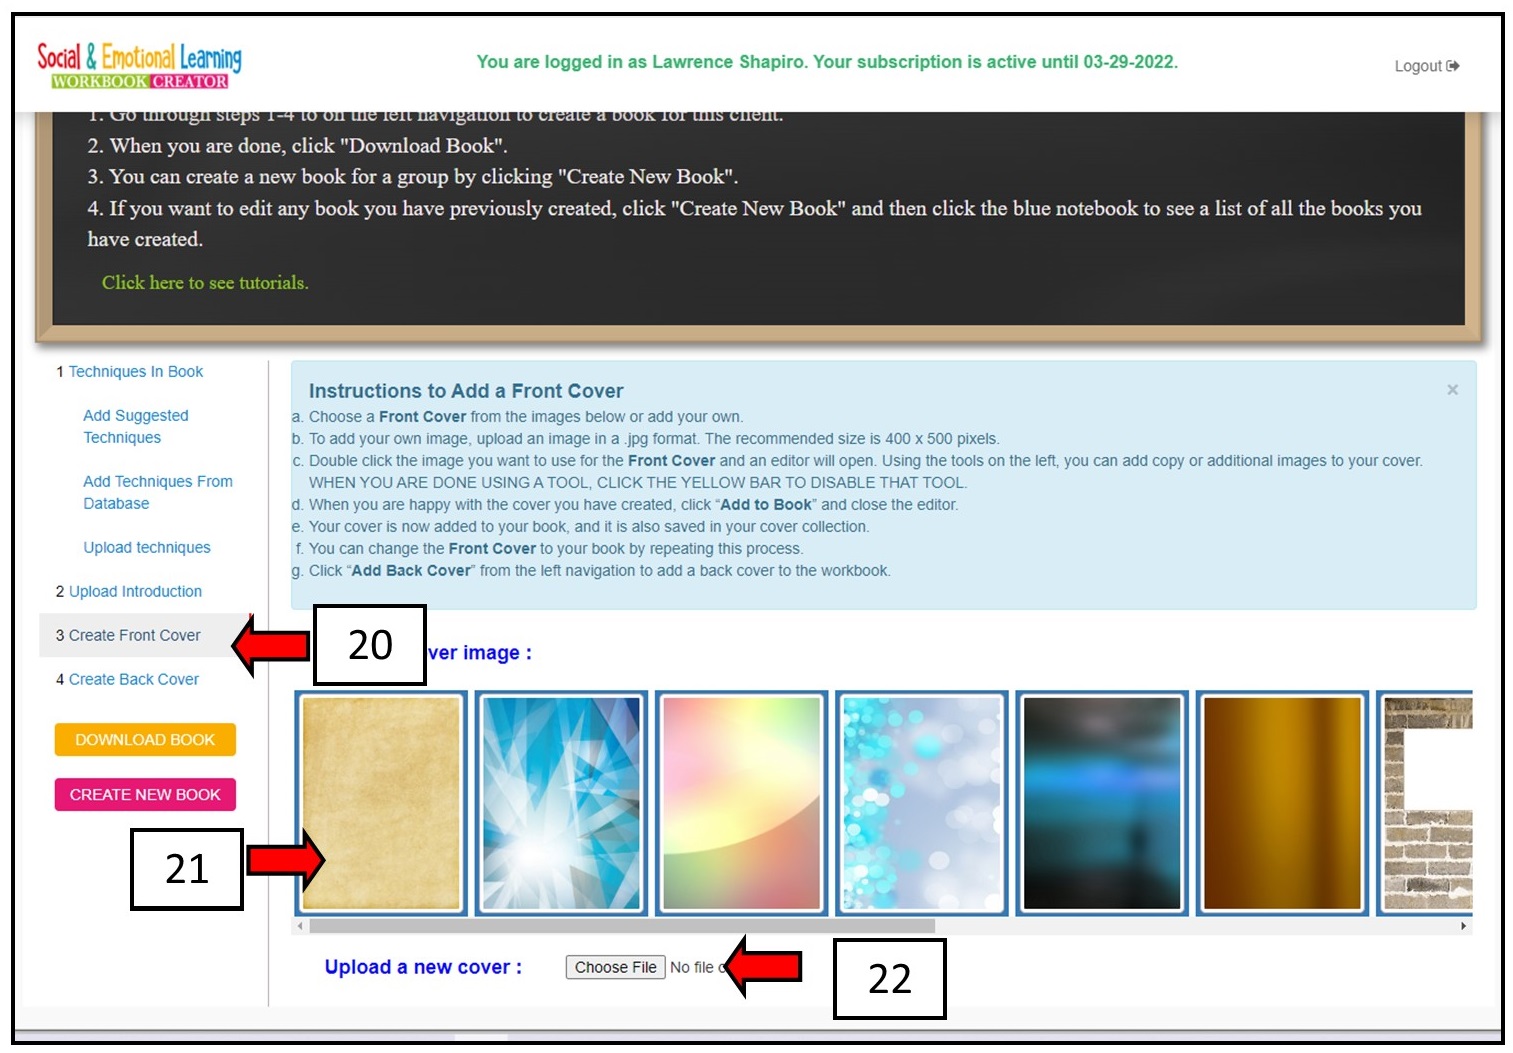
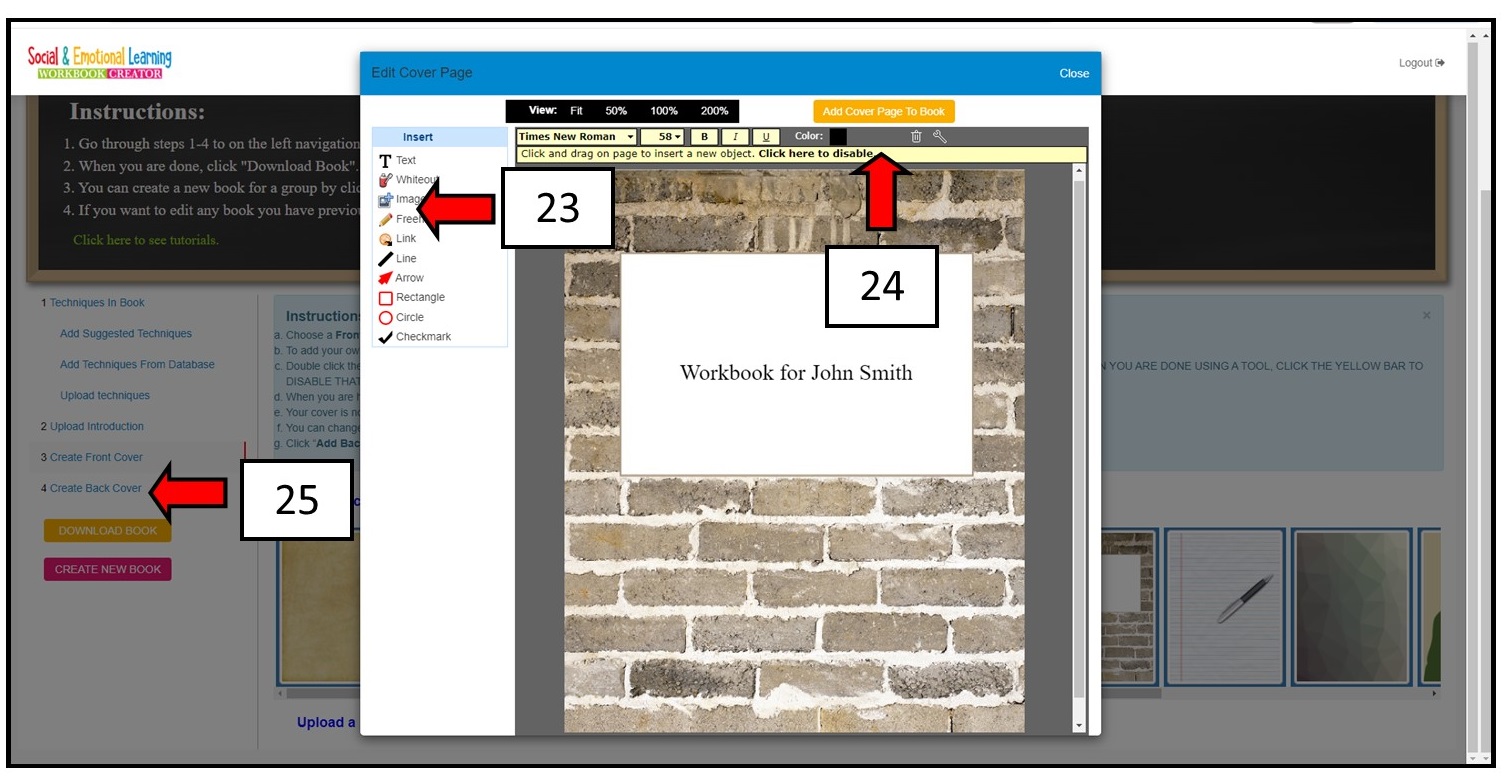
23. It’s easy to add a cover from one of our templates and you can also upload your own cover (in a jpg format). Either way, you will be able to customize the cover with our editor once you open it. The text editor lets you add text anywhere you want on the cover. You can also upload an image to cover, add shapes, and so on. Be creative and also make the cover interesting and personalized to your client.
24. Make sure you save your Cover by clicking the yellow button. This will automatically add the cover to your book.
25. You can add a Back Cover by repeating this process. Once saved it will automatically be added to your book. Now you can close the Cover editor.
26. Now it’s down to take a look at the book you created. Just click “Download a Book” and you’ll see the book with the covers, your introduction, and an automatically generated Table of Contents.
You can change any part of your book at any time, changing techniques, covers, or the introduction.
You can put your newly created book in a Virtual Counseling Room or send it to your client with our Psychology Forms Filler. We recommend that you or your client print out the workbook and put it in a binder to do assignments but if you want your client to share the book with you as they work, you should add the workbook to a Virtual Counseling Room.

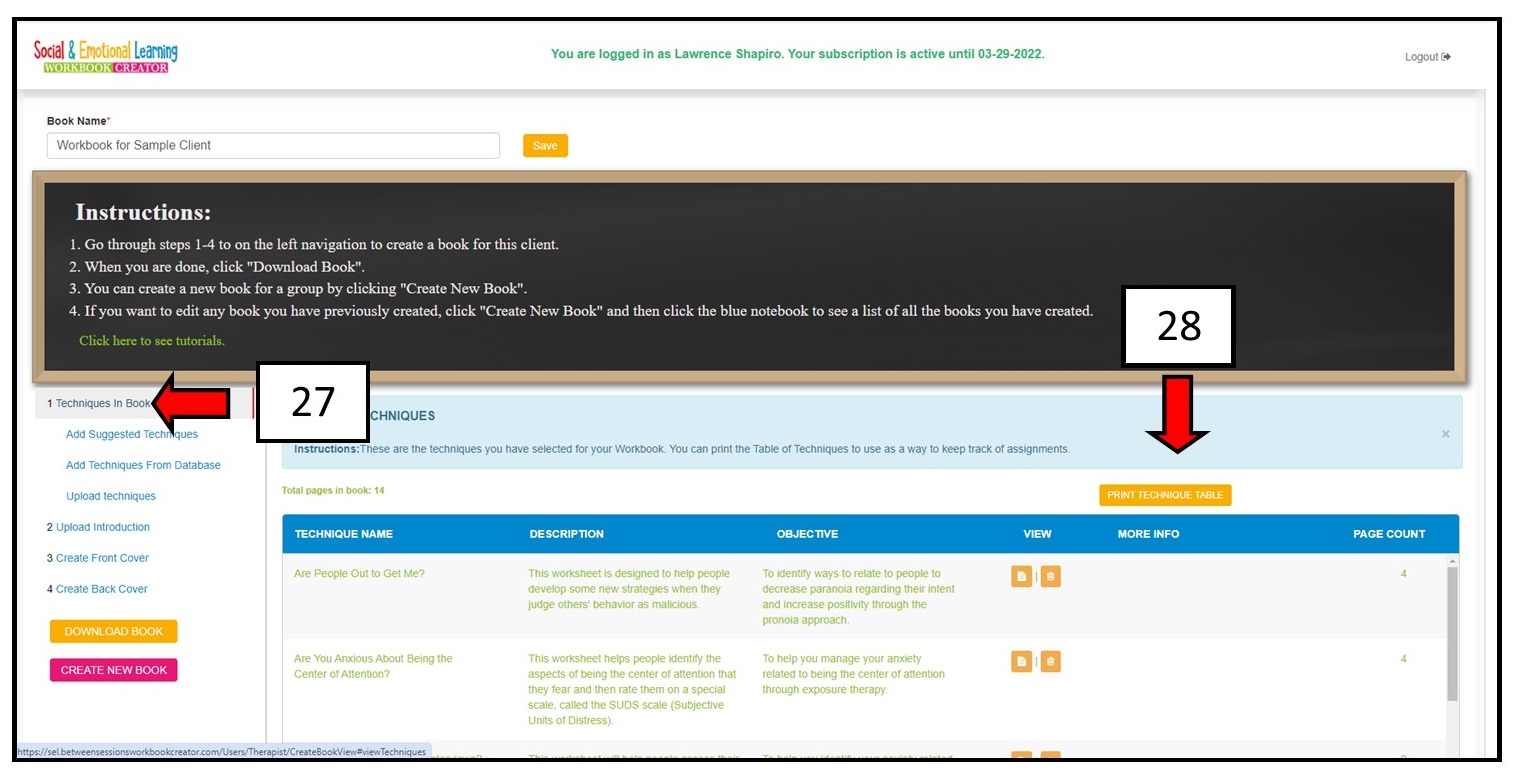
27. You can keep track of the workbook assignments you give your clients by printing out a List of Techniques. First, click the left navigation link “Techniques in Book.”
28. Then click the button “Print Techniques Table.”
This will open a PDF form that shows the techniques you put in the workbook, including the description of teach technique and the objective it addresses. There are also columns to show the date assigned and the date completed.
Creating a Generic Workbook
A second way to use the Workbook Creator is to create “generic workbooks” that are not based on a single client’s problems but rather can be used for many clients in a counseling practice, agency, or school. With the Workbook Creator, you can literally write a workbook in an hour or less. This is NOT an AI-generated workbook, but rather the workbook is created from our own proprietary algorithm with many ways for you to create a book that reflects your own expertise.
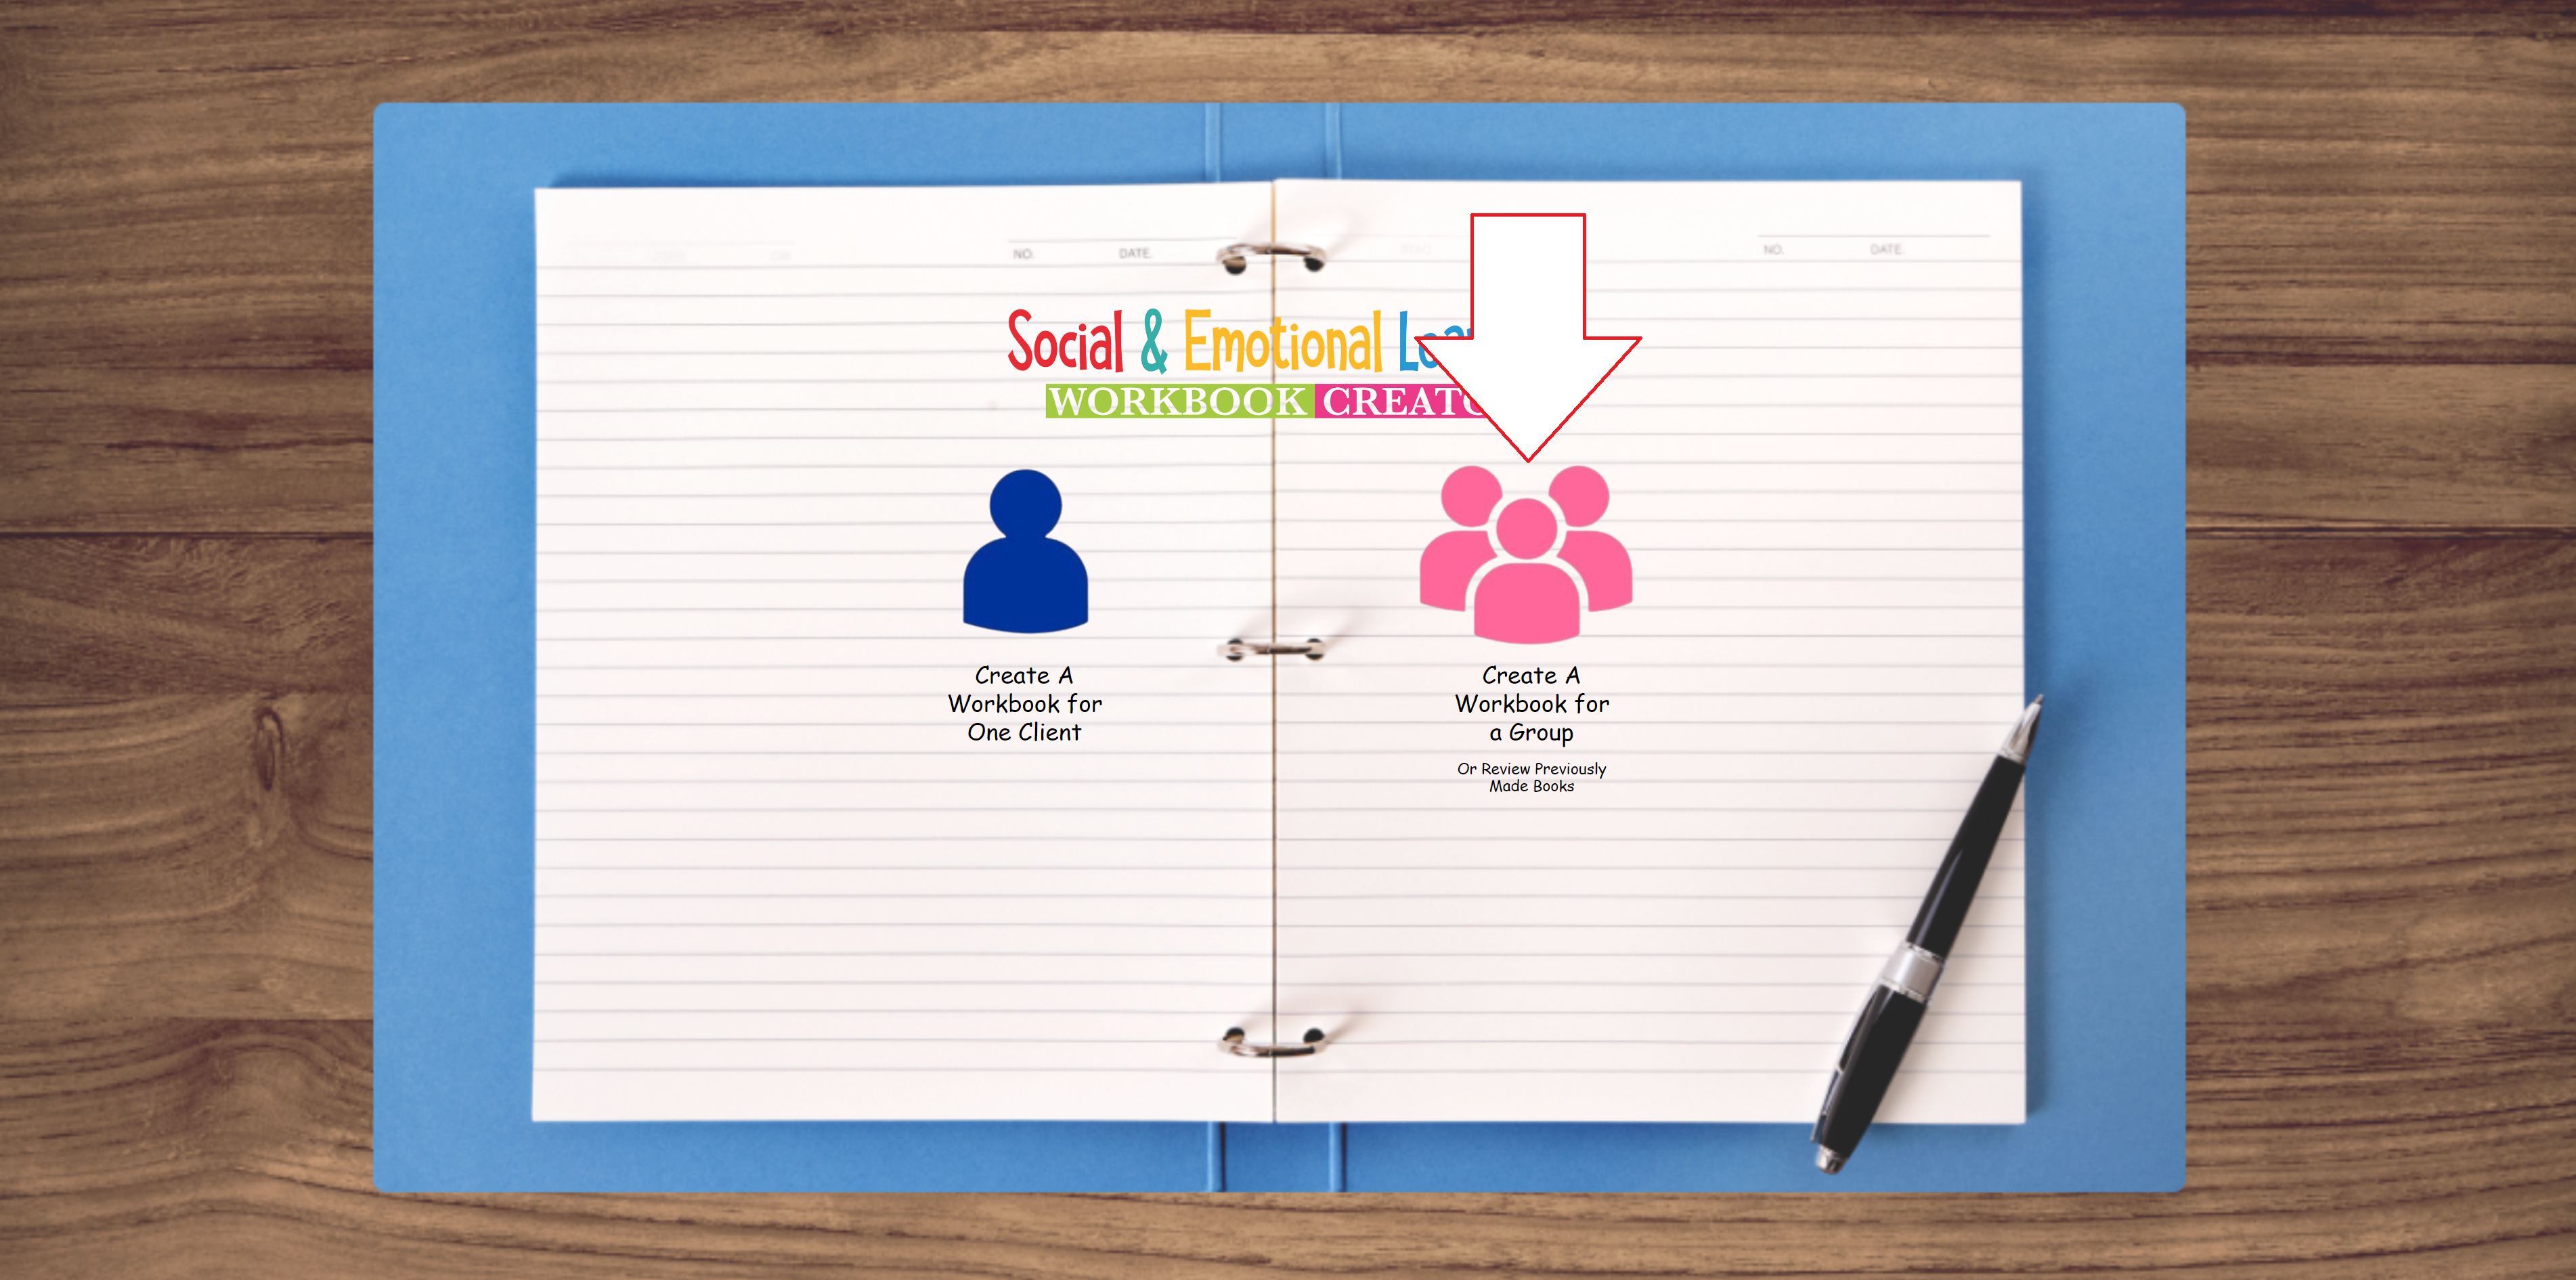
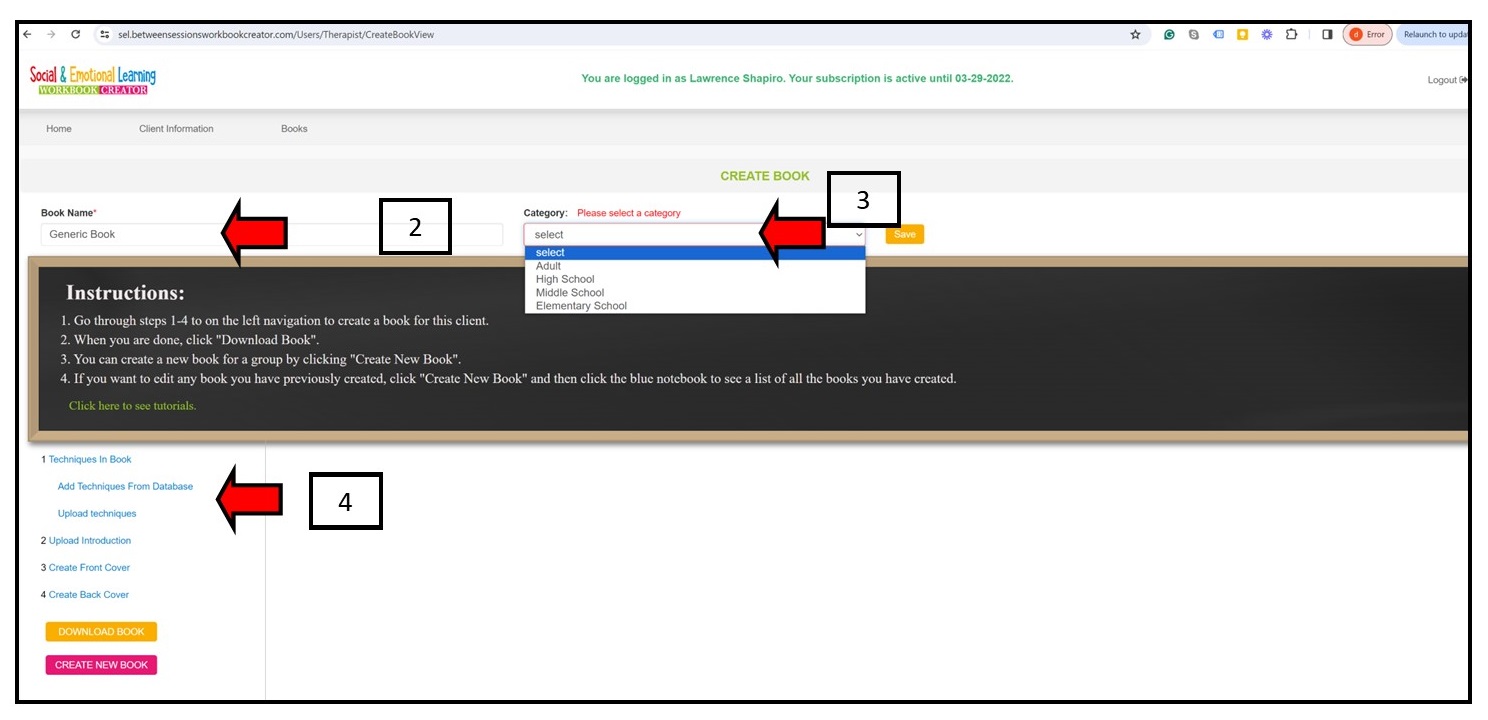
Begin by selecting the Group Workbook and then click (1) the Add a Book button.
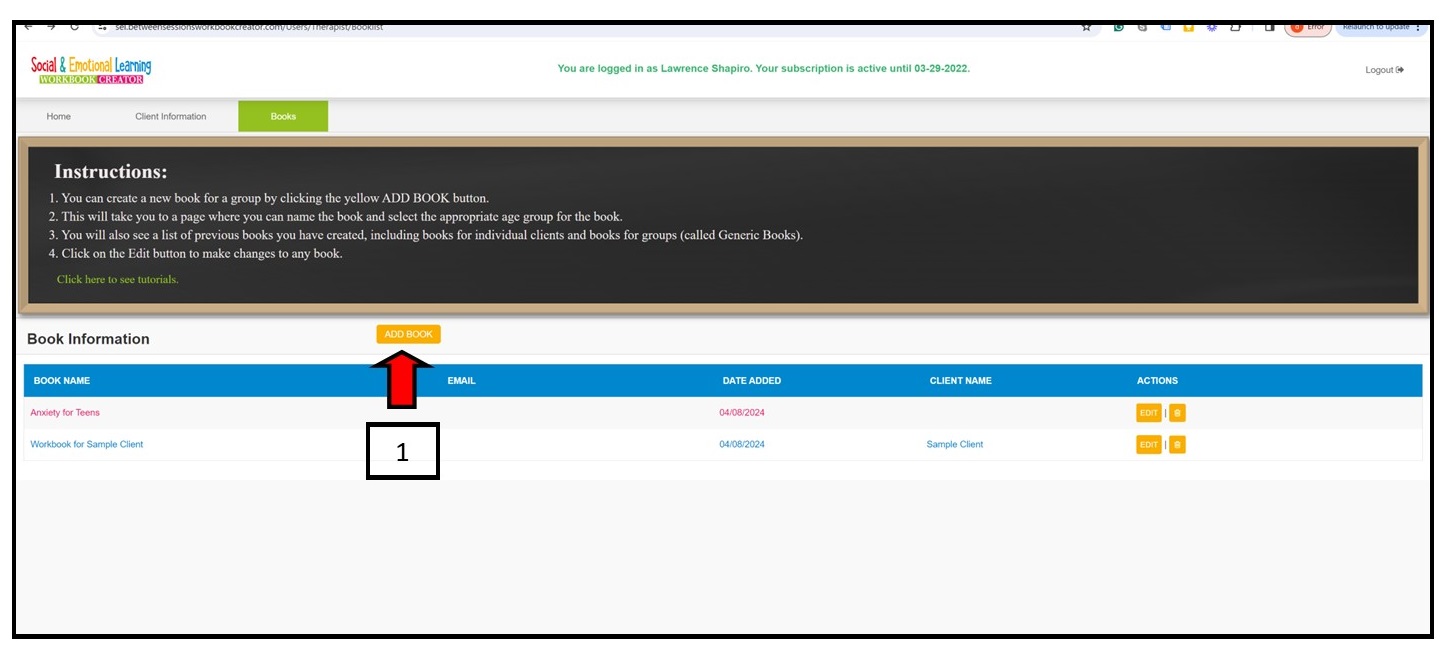
2. Give your book a name.
3. Select the age range your workbook will address.
4. Select techniques from the database or add your own techniques.
Add the Introduction and covers to your book. See Creating a Workbook for a Single Client (above), numbers 18 to 17.
You can modify any part of your workbook whenever you wish!
